
 Tweet
Tweet
’08 Yamaha 25hp ESH (2 stroke)
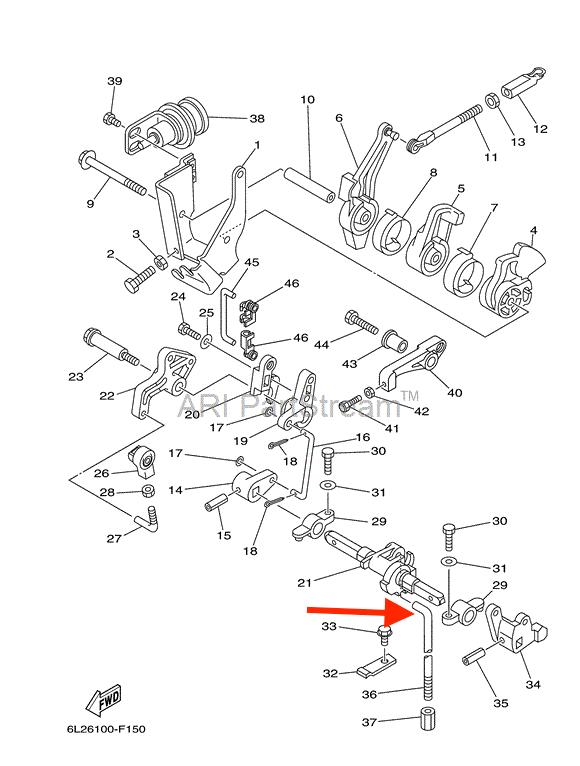
To help understand the location of the parts I’m talking about, I’ve added numeric references that can be matched up to the diagram at the bottom of this post.
I was taking the LU off of my Yamaha 25hp ESH to change the impeller.
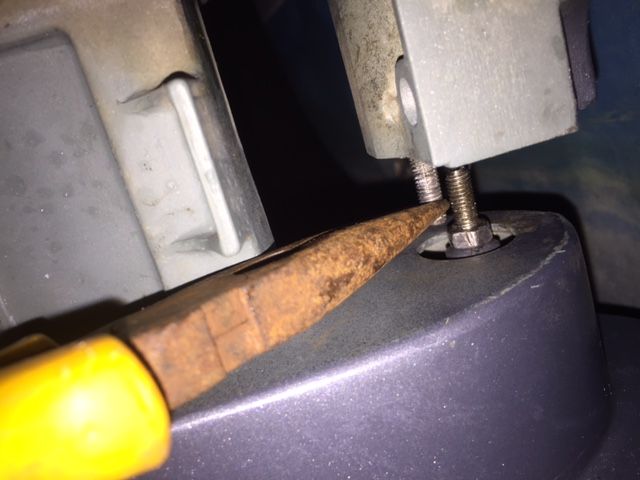
Unfortunately, the Shift Rod Connector nut (#37) was seized. I applied torch heat, and turned. Repeated heat and turn till it finally came loose. But..it the process, the Shift Rod (#36) became disconnected from the Shift Rod Lever (#21). My fault because I applied too much force trying to free the connector nut and it popped out (or something broke). So now the Shift Rod floats freely, not connected to anything. Here’s a pic of the shift rod in it’s free floating state. It won’t slide out completely, so that leads me to believe that’s it’s not broken at the 90 degree bend up top of the rod:
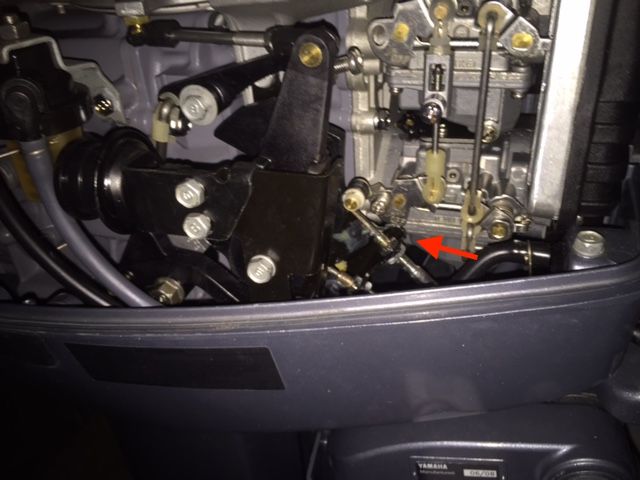
I’ve not done this repair before, so before I start removing components to get to the shift arm and lever, I want to see if there’s any known gotchas. Here’s the location of the shift arm and lever with all engine’s components in place. It’s sitting just under the lower carburetor assembly, but the shift rod itself isn’t visible.
It looks like I may be able to access the shift arm & lever by removing the Throttle Wire Stay (#1) and disconnecting the Magneto Control Lever (#6) from the Joint (#11). Will that do the trick, or will I have to remove the carburetor assembly as well? Also, how does the Shift Rod Arm (#34) factor into the connectivity of the Shift Rod Shift Rod Lever? It’s hard to understand from studying the diagram, and I want to prepare for the possible whatever work is necessary, or additional parts that I’ll need in case something is truly broken instead of simply being disconnected.
I give my trusty mechanic plenty of business with my other engines, but I think I can tackle this one with a little coaching.
Thanks in advance for any assistance.
To help understand the location of the parts I’m talking about, I’ve added numeric references that can be matched up to the diagram at the bottom of this post.
I was taking the LU off of my Yamaha 25hp ESH to change the impeller.
Unfortunately, the Shift Rod Connector nut (#37) was seized. I applied torch heat, and turned. Repeated heat and turn till it finally came loose. But..it the process, the Shift Rod (#36) became disconnected from the Shift Rod Lever (#21). My fault because I applied too much force trying to free the connector nut and it popped out (or something broke). So now the Shift Rod floats freely, not connected to anything. Here’s a pic of the shift rod in it’s free floating state. It won’t slide out completely, so that leads me to believe that’s it’s not broken at the 90 degree bend up top of the rod:
I’ve not done this repair before, so before I start removing components to get to the shift arm and lever, I want to see if there’s any known gotchas. Here’s the location of the shift arm and lever with all engine’s components in place. It’s sitting just under the lower carburetor assembly, but the shift rod itself isn’t visible.
It looks like I may be able to access the shift arm & lever by removing the Throttle Wire Stay (#1) and disconnecting the Magneto Control Lever (#6) from the Joint (#11). Will that do the trick, or will I have to remove the carburetor assembly as well? Also, how does the Shift Rod Arm (#34) factor into the connectivity of the Shift Rod Shift Rod Lever? It’s hard to understand from studying the diagram, and I want to prepare for the possible whatever work is necessary, or additional parts that I’ll need in case something is truly broken instead of simply being disconnected.
I give my trusty mechanic plenty of business with my other engines, but I think I can tackle this one with a little coaching.
Thanks in advance for any assistance.
Comment